Why DIY Kitchen Remodeling Makes Sense
DIY kitchen remodeling tips can save you thousands while changing your home’s most important space. For homeowners looking to update their kitchen without breaking the bank, here are the essential tips to get started:
- Planning first: Allocate 20% of your budget for unexpected costs
- DIY selectively: Paint cabinets, install hardware, and handle demolition yourself
- Hire pros: Leave plumbing, electrical, and structural work to professionals
- Budget wisely: Expect to spend 5-15% of your home’s value on a kitchen remodel
- Timeline reality: Allow 3 weeks to 5 months depending on scope
Kitchens are statistically the most remodeled room in the home – and for good reason. They’re the heart of family gatherings, the hub of daily activity, and one of the best investments for increasing home value. According to research, the average DIY kitchen remodel costs around $20,000, significantly less than professional renovations that can range from $15,000 to $41,000.
“Planning is the most important step to stay on budget and get everything you want,” notes one kitchen design expert. This couldn’t be more true – the difference between a stressful renovation nightmare and a successful change often comes down to proper preparation.
Whether you’re looking to paint cabinets (the most cost-effective high-impact change), install new countertops, or completely reconfigure your layout, approaching your project with the right knowledge can make all the difference.

DIY kitchen remodeling tips vocab to learn:
– Kitchen remodel cost breakdown
– Modern kitchen remodel ideas
– kitchen remodel contractor
Master Planning & Budgeting Like a Pro
Planning is where the magic happens in a kitchen remodel. Before you swing that sledgehammer or open a single paint can, taking time to plan properly will save you headaches, dollars, and your sanity during the renovation journey.
“Start with your ‘why’ and project goals,” shares kitchen design expert Jessica Marés, who has successfully completed multiple DIY kitchen renovations. “Write down exactly why you’re remodeling and what you hope to achieve. This keeps you focused when you’re tempted by shiny fixtures that don’t serve your original objectives.”
Setting a Realistic Budget
A smart approach is allocating between 5-15% of your home’s value for your kitchen remodel. This ensures you’re not pouring too much money into the project relative to what your home is worth – especially important if you might sell in the future.
Your budget should break down roughly into thirds: about one-third for cabinets, another third for labor (though going DIY will significantly reduce this portion), and the final third for everything else including countertops, appliances, flooring, and fixtures. The golden rule every experienced renovator swears by? Add a 20% contingency to cover those inevitable surprises.
“I can’t stress enough the importance of that contingency fund,” one seasoned renovator told us. “You’ll find surprises behind walls, face delivery delays, or fall in love with a backsplash tile that costs more than you expected.”

First Steps to Take
Creating a vision board is your first move – whether digital (Pinterest, Instagram) or physical (magazine clippings). This visual collection helps clarify what truly speaks to you and keeps your project focused.
Next, grab some paper and map your traffic flow. The classic work triangle connecting your sink, stove, and refrigerator should feel efficient without being cramped. Good kitchen design respects movement, so plan for clearances of at least 15 inches of landing space on either side of your cooktop and refrigerator. Walkways should measure at least 36 inches wide (42 inches for one-cook kitchens, 48 inches for two-cook kitchens).
Take time to inventory your current kitchen, noting what works well and what drives you crazy. This simple exercise helps prioritize changes that will most improve your daily life. While you’re planning, don’t forget to create a meal prep strategy for during the renovation. A temporary kitchen setup with essentials like a microwave, coffee maker, and mini-fridge will keep everyone fed and happy.
Before buying materials, research permit requirements in your area. In Las Vegas, NV, where Top Remodeling Construction operates, most structural, plumbing, electrical, or mechanical changes require permits. Finally, block out a realistic timeline with buffer days built in – because in renovation, surprises are the only certainty!
Ready to get specific numbers for your dream kitchen? Get a Free Quote to help with your planning and see how your vision aligns with your budget.
DIY vs Professional: Deciding What to Tackle and What to Hire Out
Let’s be honest – knowing your limits might be the most valuable of all DIY kitchen remodeling tips. Finding that sweet spot between rolling up your sleeves and calling in the pros can save your budget without sacrificing quality or safety.
When my neighbor Tom decided to remodel his kitchen, he thought he could handle everything himself. Three flooded floors and one minor electrical incident later, he wished he’d been more selective about his DIY ambitions!
Tasks Suitable for DIY
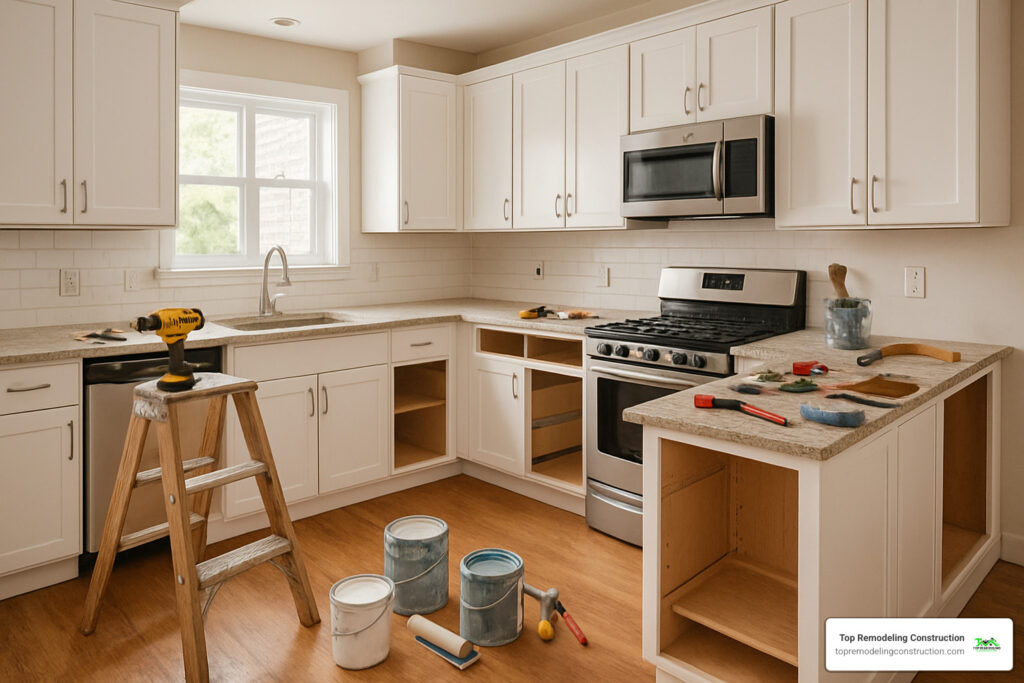
The good news is plenty of impactful kitchen projects are totally within reach for most homeowners. Demolition day can actually be therapeutic (and budget-friendly) when you’re properly equipped with safety gear and a solid plan. Just be sure to protect any surfaces you’re keeping and turn off appropriate utilities first.
Cabinet painting delivers the biggest bang for your DIY buck – changing dated oak cabinets into crisp white or trendy navy can make your kitchen feel brand new for the cost of paint and patience. Pair that with new hardware installation, and you’ve changed the entire feel of your kitchen in a weekend.
Many homeowners successfully tackle backsplash installation after watching a few tutorials. With some careful measuring and the right tools, this weekend project can add serious character to your kitchen. Similarly, floating shelves offer both style and storage while being relatively straightforward to install.
If you’re comfortable following detailed instructions, assembling stock cabinets from retailers like IKEA can save thousands compared to custom options. Just be sure to have a helper – those boxes are heavy!
Tasks Best Left to Professionals
I’ve seen too many DIY disasters to recommend tackling certain projects yourself. Plumbing relocations might seem simple in YouTube videos, but one wrong connection can lead to water damage that costs far more than hiring a plumber would have.
“I tell my clients that anything involving water, gas, or electricity deserves professional attention,” says Mark, a veteran kitchen designer. “The risk-to-reward ratio just doesn’t make sense for DIY.”
Electrical work requires understanding code requirements and safety protocols that most homeowners simply don’t have. Similarly, gas line modifications should never be DIY projects – the stakes are literally too high.
When it comes to structural changes like removing walls or expanding doorways, professional assessment isn’t just recommended – it’s essential. You need to know if that wall is load-bearing before the sledgehammer comes out.
While pre-cut laminate countertops might be DIY-friendly, countertop fabrication for materials like quartz or granite requires specialized tools and expertise. And HVAC modifications involve complex calculations for proper ventilation that professionals spend years learning.
Safe Handling of Plumbing & Electrical
If you’re determined to tackle some basic plumbing or electrical work, safety must be your top priority. Always shut off water completely at the main valve before touching any plumbing connections. Install accessible shut-off valves for all fixtures so small future repairs don’t require turning off water to the entire house.
For electrical work, GFCI outlets are non-negotiable near water sources – they can prevent serious shocks. Before touching any wires, verify power is off with a circuit tester, not just by flipping the switch. And never exceed the load calculations your circuits were designed to handle.
In Las Vegas (and most places), permit pulls are required for significant plumbing and electrical changes. Even if you do the work yourself, it must be inspected to ensure code compliance – which protects both your safety and your home’s value.
The perfect kitchen remodel balances DIY enthusiasm with professional expertise where it matters most. As one client told us after her successful renovation: “Knowing when to pick up the phone instead of the tool was the smartest decision I made.”
DIY kitchen remodeling tips: The Step-by-Step Game Plan
A successful kitchen renovation is like choreographing a dance – each step must happen in the right order, or you’ll end up with costly mistakes and frustrating do-overs. Let me walk you through the sequence that will save your sanity (and your budget).

I remember my first kitchen renovation – I was so excited to install my new refrigerator that I brought it in before the flooring was complete. Big mistake! Trust me when I say following this timeline will make your life so much easier.
Your renovation journey should flow in this sequence: demolition first, then rough-in work for plumbing and electrical, followed by drywall and paint, cabinets, flooring, countertops, backsplash, and finally fixtures. Think of it as building layers from the studs outward.
“The most common mistake I see is homeowners rushing to install appliances before the proper infrastructure is in place,” says Carlos, one of our veteran contractors. “Make sure your electrical and plumbing are ready before those beautiful new appliances arrive.”
Planning should start months before demo day. Give yourself 1-3 months to finalize designs, order materials (especially cabinets, which can take 5-10 weeks!), and secure permits. Then allow 3-7 days for demolition, protecting other areas of your home during this dusty phase.
The rough-in stage typically takes 1-2 weeks, covering all the “behind the walls” work – framing, plumbing, electrical, and HVAC modifications. Don’t forget inspections before closing up walls! Next comes drywall and paint (1-2 weeks), which is much easier in an empty room.
For flooring and cabinets, sequence matters. Tile and hardwood typically go in before cabinets, while vinyl and laminate often go in after. Cabinet installation takes 3-5 days, followed by countertop templating, fabrication (usually off-site), and installation (1-2 weeks total).
Backsplash installation (2-3 days) should always follow countertops, and needs proper curing time before grouting. The home stretch includes fixtures and finish work (2-3 days) and final touches like caulking and cleaning (1-3 days).
Many homeowners find project management apps helpful for tracking this workflow. Remember to build in contingency days – even the best-planned renovations encounter surprises!
Measuring for Cabinets & Appliances
Nothing derails a kitchen renovation faster than measurement mistakes. Accurate measurements are absolutely critical – even small errors can lead to costly adjustments or unusable spaces.
Before ordering a single cabinet, know these standard measurements: counter height typically runs 34-36 inches, upper cabinets should sit 18 inches above counters, and standard cabinet depth is 24 inches. Proper walkways make or break a kitchen’s functionality – allow at least 36 inches (though 42-48 inches is better for multiple cooks).
Landing space is another crucial but often overlooked measurement – you need at least 15 inches on either side of your sink, refrigerator, and cooktop for setting down items and food prep.
“I once had a client who ordered a refrigerator that was 1/2 inch wider than the space allowed,” recalls Maria, one of our kitchen designers. “We had to modify the entire cabinet run to accommodate it. Measure twice, order once!”
This is especially important when planning your work triangle – the imaginary line between your sink, stove, and refrigerator. An efficient triangle minimizes steps while cooking but should total between 12 and 26 feet for optimal function.
When measuring for appliances, don’t trust online specifications blindly. Always verify dimensions in person when possible, accounting for door swing clearances and ventilation requirements. Those small discrepancies can cause major headaches during installation.
For more detailed information on custom cabinetry options that perfectly fit your space, check out our guide on Cabinetry Releaseed: Designing Your Dream Custom Cabinets.
The extra time spent on careful measurement and planning pays off tremendously in the smooth execution of your DIY kitchen remodeling tips and strategies.
Smart Design Choices & Material Picks on a Budget
Who says you need to empty your savings account for a stunning kitchen? The secret to a wallet-friendly remodel is knowing exactly where to invest and where you can save without sacrificing style or function.
Budget-Friendly Cabinet Solutions
Cabinets typically gobble up about 30% of your kitchen budget, but there are clever ways to refresh them without the premium price tag.
Painting existing cabinets might be the best-kept secret in DIY kitchen remodeling tips. With just $200-500 in materials, you can completely transform your kitchen’s personality. Remember though, this is 90% preparation work—thorough sanding, proper priming, and high-quality cabinet-grade enamel paint make all the difference between “obviously DIY” and “professionally done.”
“I saved nearly $15,000 by painting my oak cabinets instead of replacing them,” shares homeowner Maria Collins. “The key was taking my time with prep work and applying thin, even coats.”
Cabinet refacing is another smart middle-ground approach. By keeping your sturdy cabinet boxes but replacing just the doors and drawer fronts, you’ll spend about half what new cabinets would cost while achieving that fresh, updated look.
For the savvy budget-conscious remodeler, mixing stock and custom elements offers tremendous value. Using IKEA or similar cabinet bases with custom fronts can save up to $25,000 while still giving you that bespoke kitchen appearance that friends will envy.

Countertop Value Tiers
Your countertop choice dramatically impacts both your budget and daily experience in the kitchen. Let’s break down your options:
Budget-Friendly ($15-40 per square foot) options include laminate, which has come a long way with realistic stone patterns, and butcher block, which brings warmth but needs regular oiling. Tile countertops offer affordability and creative potential, though those grout lines will require maintenance.
In the Mid-Range ($40-75 per square foot), granite remains popular for its natural beauty and unique patterns. Solid surface materials like Corian offer seamless installation and repairability. Quartz has become the darling of this category—extremely durable, non-porous, and available in countless patterns.
For those with more generous budgets, High-End options ($75-200 per square foot) include marble (gorgeous but high-maintenance), quartzite (natural stone with marble-like appearance but better durability), and custom concrete counters for that distinctive industrial aesthetic.
“If you love the look of marble but worry about maintenance, consider a marble-look quartz or porcelain,” suggests Melanie Torres, a countertop specialist. “They give you the aesthetic without the etching and staining concerns.”
Flooring That Balances Cost and Durability
Your kitchen floor takes a beating—drops, spills, constant foot traffic—so durability matters as much as appearance.
Luxury Vinyl Plank (LVP) has revolutionized kitchen flooring at just $2-7 per square foot. It’s waterproof, extremely durable, and comes in styles that convincingly mimic wood and stone. Many homeowners install this themselves, making it a perfect DIY kitchen remodeling tips candidate.
Ceramic tile ($2-15 per square foot) offers excellent durability and water resistance, though it’s harder underfoot than other options. The wide price range reflects simple subway tiles at the low end and handcrafted artisanal tiles at the high end.
Engineered hardwood ($6-12 per square foot) gives you real wood’s beauty with better moisture resistance—a smart compromise for kitchens where traditional hardwood might be problematic.
Bamboo flooring ($5-8 per square foot) deserves special mention as an eco-friendly option that’s actually tougher than traditional hardwood. Its rapid renewability makes it a sustainable choice with no sacrifice in durability.
Lighting Layers for Function and Style
A well-designed kitchen needs three types of lighting working in harmony. Ambient lighting provides overall illumination through recessed lights or ceiling fixtures. Task lighting focuses on work areas with under-cabinet lights and pendants over islands. Accent lighting adds drama and highlights features through cabinet interior lights or decorative fixtures.
“Lighting is often an afterthought, but it’s actually where function and style intersect most dramatically in a kitchen,” notes lighting designer James Chen. “Good lighting makes food preparation safer and more enjoyable while setting the mood for the entire space.”
For more guidance on creating a perfectly lit kitchen, the Shades of Light guide to layered lighting offers excellent visual examples and planning tools.
Accessible Design Considerations
Whether you’re planning to age in place or simply want a more inclusive kitchen, thoughtful design choices make a difference without necessarily adding cost.
Installing counters at varying heights (standard 36″ with some sections at 30″ for seated work) creates versatility for all users. Choosing pull-out drawers instead of traditional cabinets with doors makes access easier for everyone. D-shaped handles require less grip strength than knobs, while ensuring 42-48 inch clearances makes the space navigable for those using mobility devices.
Roll-under sinks and cooktops allow seated users to work comfortably, and these modifications often add value to your home by appealing to a broader range of future buyers.
For inspiration on different styles and approaches, browse our Mix of Kitchen Remodeling Projects gallery.
Maximizing Storage & Organization
Smart storage solutions make your kitchen more functional without increasing its footprint—a key principle in DIY kitchen remodeling tips.
Deep drawers in base cabinets transform how you access pots and pans—no more kneeling and reaching into dark cabinet depths. Pull-out shelves retrofit into existing cabinets for similar benefits. Vertical dividers turn awkward cabinet spaces into perfect storage for baking sheets and cutting boards.
Lazy Susans banish the frustration of corner cabinets, while workstation sinks with built-in cutting boards and drying racks maximize counter space. Floating shelves keep frequently used items visible and accessible while adding visual interest.
One of the cleverest storage innovations? Toe-kick drawers that use the 4-inch space under cabinets for rarely used items like holiday platters or specialty tools.
“My favorite storage hack is adding a narrow pull-out pantry cabinet,” shares kitchen designer Rebecca Wong. “Even a 6-inch wide cabinet can store spices, oils, and canned goods in an otherwise unusable space between appliances.”
For additional organization accessories to maximize your storage potential, check out Parts and Accessories for smart solutions to common kitchen storage challenges.
Staying Sane During the Remodel, Avoiding Mistakes & Quick FAQs
Let’s be honest – living through a kitchen renovation can test even the most patient homeowner’s sanity. When your home’s heart is temporarily out of commission, daily routines get turned upside down. But with some thoughtful preparation, you can make this challenging time much more manageable.
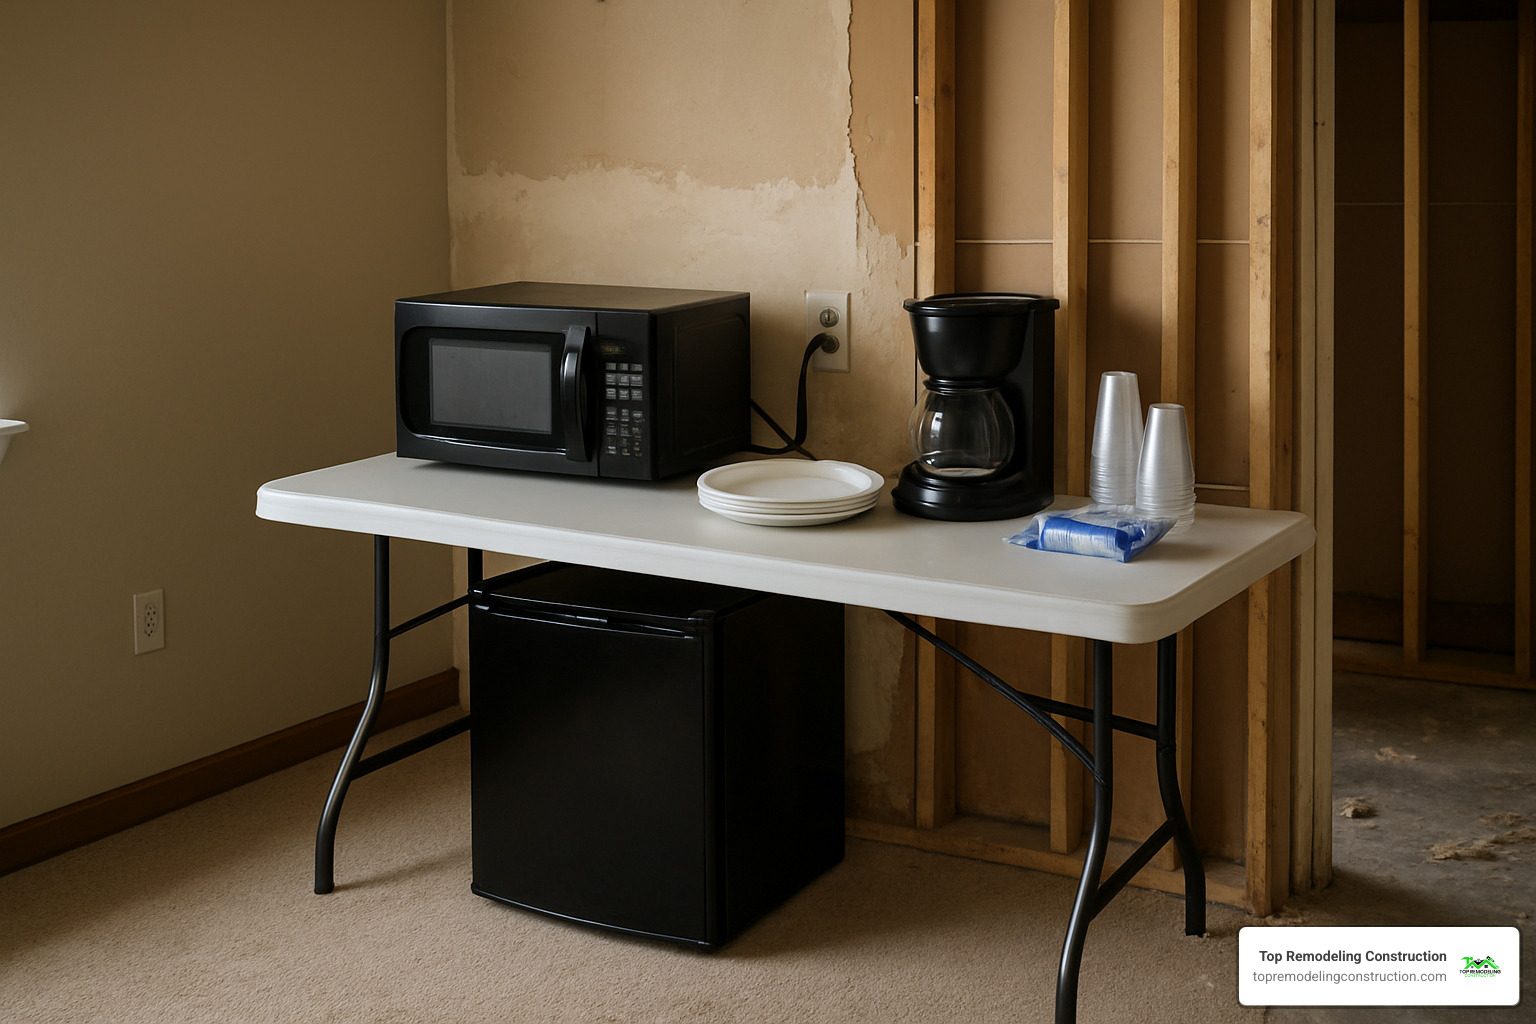
Setting up a temporary kitchen elsewhere in your home is absolutely essential. Find a corner of your dining room, basement, or even garage where you can create a makeshift food prep area. Stock it with the essentials – a microwave, coffee maker (because no one should face construction noise uncaffeinated), an electric skillet, and a mini-fridge for basics.
“We set up our temporary kitchen in the guest bedroom,” shares Maria, who recently completed her DIY renovation. “It wasn’t pretty – microwave on a folding table, dishes in plastic bins – but it kept us from spending a fortune on takeout for two months.”
Switching to disposable dishes during the renovation might not be the most eco-friendly choice, but it’s a temporary sanity-saver when washing dishes in a bathroom sink or tub becomes your reality. If this bothers you environmentally, look for compostable options or designate one set of dishes per family member to minimize washing.
Meal planning becomes critical during a renovation. Many seasoned renovators recommend cooking and freezing meals before demolition day. Slow cookers, instant pots, and air fryers become invaluable tools during this time. Simple sandwiches, salads, and no-cook meals will become your best friends.
If you’re working with contractors, establish a daily communication window – perhaps a 15-minute morning check-in – to discuss progress and address concerns without constant interruptions throughout the day. This keeps everyone informed while preserving your ability to work, parent, or simply maintain your peace of mind.
Don’t underestimate the value of occasionally escaping the chaos. Plan weekend getaways or even dinner out when the dust and noise become overwhelming. Your mental health is worth the investment!
Common Mistakes to Avoid
The difference between a successful renovation and a regrettable one often comes down to avoiding these common pitfalls:
Budget creep happens to almost everyone, but it can quickly spiral out of control. When you see that gorgeous backsplash tile that costs twice what you budgeted, or start thinking “while we’re at it, we might as well…” – stop and revisit your original goals. Ask yourself if this addition serves your primary objectives or if it’s just a shiny distraction.
Poor lighting is one of the most overlooked aspects of kitchen design. A beautiful kitchen with inadequate lighting won’t function well and won’t showcase all your hard work. Plan for layered lighting with ambient overhead lights, task lighting for work surfaces, and accent lighting to highlight special features.
Ignoring clearances is a mistake that affects daily functionality. Ensure you have at least 36 inches for walkways, adequate space for appliance doors to open fully, and enough room around islands for comfortable movement. Measure repeatedly and use painter’s tape on the floor to visualize traffic patterns before finalizing any layout.
“The most challenging part for me was going 11 weeks without a kitchen sink,” recalls one DIYer. “We set up a dishwashing station in our bathroom with plastic bins for washing and rinsing. It wasn’t ideal, but having a system made it bearable.”
Choosing trendy over timeless often leads to renovation regret. While that ultra-modern faucet might look amazing today, will you still love it in five years? Select classic finishes for permanent elements like cabinets and countertops, then express your personality through easily changeable items like hardware, lighting fixtures, and accessories.
For more information on costs associated with kitchen remodels, check out How Much Does a Kitchen Remodel Cost?
Frequently Asked Questions
How long does a typical DIY kitchen remodel take?
A DIY kitchen remodel typically stretches between 3 weeks to 5 months, depending on several factors. The scope of your project plays a huge role – are you simply updating surfaces, or gutting the space completely? Layout changes, especially those involving plumbing or electrical work, add significant time.
Material lead times can also dramatically affect your timeline – custom cabinets might take 8-12 weeks to arrive, while stock options could be available immediately. And perhaps most importantly, how much time can you realistically dedicate to working on the project? Weekend warriors will naturally take longer than those who can devote full days to the renovation.
Most homeowners significantly underestimate the time required. A good rule of thumb? Take your initial estimate and add 50%. This buffer helps account for unexpected challenges and keeps frustration at bay.
What is the best order of steps for a DIY kitchen project?
Following the right sequence saves time, money, and headaches. The optimal order is:
- Complete planning and design first – measure twice, order once
- Order materials with long lead times (especially cabinets and appliances)
- Handle demolition carefully, salvaging anything reusable
- Complete rough-in work (plumbing, electrical, HVAC) before closing walls
- Finish drywall and painting while the room is empty
- Install flooring (though this sometimes comes after cabinets, depending on type)
- Mount cabinets precisely, ensuring they’re level
- Schedule countertop templating and installation
- Install backsplash after countertops are secure
- Add fixtures, appliances, and hardware
- Complete final touches and thorough cleaning
“Paint walls and ceiling first, install flooring next, then cabinets, and finish with backsplash, faucets, fixtures and appliances,” advises one renovation expert. “Working from the top down and in the right sequence prevents damage to your new elements.”
How can I ensure my remodel adds value to my home?
To maximize your return on investment, focus on these proven strategies:
Keep renovations proportional to your home’s value (that 5-15% rule we mentioned earlier) to avoid over-improving for your neighborhood. Choose timeless materials for permanent elements that will appeal to most buyers. Ensure all work, especially plumbing and electrical, is completed to professional standards – even if that means hiring pros for those specific tasks.
Layout improvements that improve functionality almost always pay off. Open concepts, islands with seating, and efficient work triangles have broad appeal. Select neutral colors for major elements like cabinets and countertops, while investing in quality appliances that future buyers will appreciate.
“Kitchens generally recoup 100% of spend at resale when done properly,” notes one real estate expert. “But over-customization for your specific tastes might limit appeal to future buyers.”
At Top Remodeling Construction, we’ve seen how attention to detail and thoughtful planning can transform not just kitchens, but the entire home experience. Whether you’re going fully DIY or need expert guidance along the way, focusing on quality and functionality ensures your kitchen will serve you well for years to come.
For more inspiration and guidance on your kitchen change journey, visit our Kitchen Remodel page.
Conclusion
Starting on a DIY kitchen remodel journey might seem daunting at first, but the satisfaction of changing your home’s heart with your own hands is truly best. Not to mention the thousands you’ll save in the process!
Throughout this guide, we’ve walked through the essential DIY kitchen remodeling tips that can make your renovation both successful and enjoyable. Proper planning is truly the foundation of any successful project. Those who take time to create detailed plans before picking up a hammer consistently report smoother renovations with fewer unexpected issues.
Your budget should always include that crucial 20% contingency fund – it’s not pessimism, it’s realism! Even the most carefully planned projects encounter surprises, and having that financial cushion prevents stress when you find that perfect pendant light or need to address unexpected plumbing issues.
One of the most valuable lessons experienced DIYers share is knowing your limits. There’s no shame in tackling cabinet painting yourself while calling in professionals for electrical work. In fact, this balanced approach often yields the best results – professional-quality work where it matters most, with personal touches that make the space uniquely yours.
Following the proper sequence is non-negotiable. As one homeowner told us after learning the hard way: “Installing my beautiful new flooring before the messy drywall work was a $3,000 mistake I’ll never make again!” The right order saves both time and heartache.
When selecting materials, smart choices balance immediate cost with long-term value. Those budget-friendly vinyl floors might look great today, but will you still love them in five years? Sometimes investing a bit more upfront pays dividends in durability and satisfaction.
Don’t underestimate the importance of a temporary kitchen setup! Having a designated space with a microwave, coffee maker, and mini-fridge can preserve your sanity during those weeks without a functional kitchen. As one DIYer shared, “Our makeshift kitchen in the dining room saved our marriage during our three-month renovation!”
At Top Remodeling Construction, we understand that kitchen renovations come in all shapes and sizes – from complete DIY trips to projects where professional guidance makes all the difference. As a family-owned business serving Las Vegas, we’ve seen how attention to detail transforms ordinary kitchens into extraordinary gathering spaces, whether we’re handling the entire renovation or supporting specific aspects of your DIY journey.
Ready to turn those Pinterest dreams into your kitchen reality? For additional guidance or professional assistance with your kitchen change, explore our Kitchen Remodel page.
With these DIY kitchen remodeling tips in your toolkit, a healthy dose of patience, and realistic expectations, you’re well-equipped to create the kitchen you’ve always wanted – without losing your mind (or emptying your wallet) in the process. Happy remodeling, and enjoy every moment in your new kitchen!