Transform Your Bathroom: The Complete Tile Installation Guide
Bathroom tile installation is a project that can dramatically transform your space while providing durability and moisture protection. If you’re looking to tackle this project yourself, here’s what you need to know:
Quick Bathroom Tile Installation Guide:
1. Plan & measure – Add 15% extra for cuts and waste
2. Prepare subfloor – Must be clean, level and stable
3. Install backer board – Essential for moisture protection
4. Layout design – Dry-fit tiles with spacers before installing
5. Mix mortar – To peanut-butter consistency
6. Set tiles – Work in small sections, maintain even spacing
7. Allow curing – Wait 24 hours before grouting
8. Apply grout – Fill joints completely, clean excess
9. Seal grout – Wait 72 hours after grouting
Whether you’re updating an old bathroom floor or installing new tiles, ceramic or stone tile provides best longevity and appearance. While professional installation costs between $8-$20 per square foot for labor alone, a DIY approach can save you $500-$1,500 on a typical bathroom project.
The average cost to tile a bathroom is $10 to $50 per square foot installed, depending on material choices and project scope. Most bathroom tile jobs take 6-8 hours of active work spread over 2-3 days to allow for proper drying times.

Bathroom tile installation terms to learn:
– bathroom installation contractors near me
– remodeling construction company
– perfect home remodeling
Why This Guide Matters
Properly installed bathroom tile does more than just look beautiful—it provides crucial moisture control in one of your home’s wettest environments. Quality bathroom tile installation creates a waterproof barrier that protects your subfloor and walls from water damage, preventing costly repairs down the road.
A well-executed tile project can last 20+ years with proper care, making it one of the most durable bathroom finishes available. By following our comprehensive guide, you’ll not only save significant money on labor costs but also gain the satisfaction of creating a custom space exactly to your preferences.
Here in Las Vegas, we’ve seen how proper tile installation can transform a bathroom from outdated to outstanding while increasing home value.
Plan & Prepare Your Project
The success of any bathroom tile installation begins with thorough planning. Let’s break down the essential considerations before you pick up a trowel.

Tile Types: Choosing the Right Material
Ceramic tile offers tremendous value at $12-$40 per square foot installed. These tiles come in endless colors and patterns and are relatively easy to cut—perfect if you’re new to tiling. While they’re not quite as tough as porcelain, they work beautifully for bathroom walls and floors that don’t see heavy traffic.
For high-traffic bathrooms, porcelain tile is worth the slightly higher price tag ($15-$50 installed). With an absorption rate of 0.5% or less, these tiles are highly water-resistant and incredibly durable, though they can be more challenging to cut.
Stone tile brings unique patterns and a high-end feel to any bathroom at $10-$50 per square foot installed. Just remember they need regular sealing and can be slippery when wet.
For a touch of modern sparkle, glass tile ($20-$100 installed) reflects light beautifully and is completely waterproof. These tiles make stunning shower walls and backsplashes, though they aren’t ideal for floors due to their slippery nature.
When budget is the primary concern, vinyl tile at $3-$10 per square foot installed offers a water-resistant, DIY-friendly option.
For floor tiles, look for a DCOF (Dynamic Coefficient of Friction) rating of 0.42 or higher to prevent slips. Smaller tiles naturally provide better traction thanks to more grout lines.
Always purchase about 15% more tile than your measured area to account for cuts, breaks, and future repairs. If you’re planning a complex pattern like herringbone, bump that up to 20%.
Accurate Measurements & Ordering
Measuring correctly saves both money and headaches. Start with a good quality metal tape measure to prevent sagging over longer distances.
When measuring floors, go wall-to-wall, ignoring baseboards. For each section, multiply length by width to get square footage. Don’t forget to subtract areas larger than one square foot that won’t be tiled, like your bathtub footprint or shower pan.
For walls, measure each section separately (height × width). If you’re planning a partial wall tile or wainscot, the standard height is 42 inches, though you can divide your ceiling height by three for a custom proportion.
Order enough extra tile:
* 10% extra for standard grid layouts
* 15-20% extra for diagonal patterns
* 20%+ for complex patterns like herringbone or basketweave
Bathroom Tile Installation Layout Planning
A thoughtful layout transforms an ordinary tile job into something special. Start by finding and marking the center of each wall, then snap chalk lines to create a grid at the room’s center.
Always dry-fit your tiles with spacers before mixing any mortar. This simple step can save you from awkward cuts and unbalanced patterns. Adjust your starting point to avoid thin slivers of tile along walls.
For the most professional look, ensure cut tiles are equal size on opposite walls and place full tiles in high-visibility areas like doorways. When working with decorative elements or accent tiles, align them with fixtures or architectural features for a purposeful design.
Budget & Permit Checklist
For 2025, expect to pay between $10-$50 per square foot all-in, depending on your tile choices. For an average bathroom (40-160 sq ft), that’s about $400-$8,000 total.
The materials themselves run $2-$30 per square foot, while professional labor adds another $8-$20 per square foot. Don’t forget to budget for removing old tile ($2-$7/sq ft), potential subfloor replacement, backer board, and waterproofing materials.
Time-wise, a small bathroom floor typically takes 6-8 hours of active work, while doing both floors and walls extends that to 2-3 days. Factor in curing times between steps, and you’re looking at 4-7 days total from start to finish.
Most simple bathroom tile installation projects don’t require permits unless you’re moving plumbing fixtures or making structural changes. That said, it’s always smart to check with your local Las Vegas building department before starting.
Looking for more bathroom tile inspiration? Check out these creative bathroom tile ideas that might spark your imagination for your own project.
Tools, Materials & Surface Preparation
Gathering the right tools and preparing your surfaces properly can make the difference between a bathroom tile installation that lasts decades and one that fails within months.
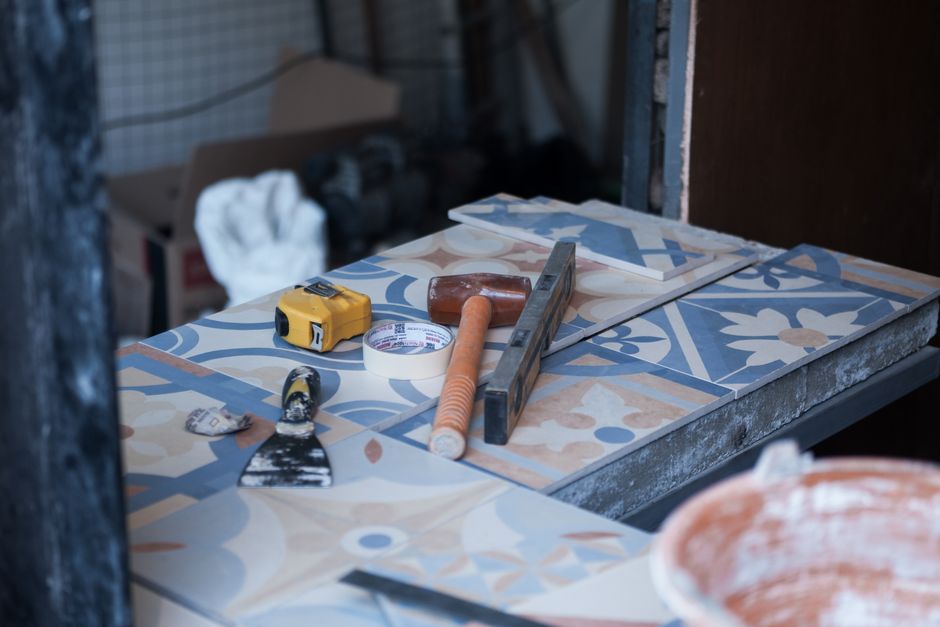
Essential Tools:
For measuring and layout, you’ll need a reliable tape measure, a 2′ and 4′ level, chalk line, square, and pencil. These help ensure your tiles align perfectly.
When it comes to cutting tiles, a wet saw is your best friend. You can rent one for about $50-75 per day from most home improvement stores. Also grab some tile nippers for small cuts and a hole saw for working around pipes. A contour gauge is incredibly helpful for those tricky cuts around toilet flanges or curved surfaces.
For the actual installation, you’ll need notched trowels (a 1/4″ × 1/4″ works for most floor tiles), a margin trowel for mixing smaller batches of mortar, a rubber mallet, tile spacers, a grout float, and several sponges. Don’t forget buckets for mixing and a mixing paddle that attaches to your drill.
Protective equipment includes knee pads, safety glasses, a dust mask (tile dust contains silica), work gloves, and ear protection when cutting.
Essential Materials:
Beyond the tiles themselves, you’ll need cement backer board for both walls and floors, galvanized or stainless steel screws, mesh tape for seams, and an uncoupling membrane like Schluter-DITRA to prevent cracks from transferring to your tiles.
For wet areas like showers, a waterproofing membrane is essential. The Ceramic Tile Education Foundation (CTEF) emphasizes this point in their scientific research on substrate rigidity.
For setting materials, you’ll need thinset mortar, grout (sanded for joints wider than 1/8″, unsanded for narrower joints), grout sealer, and silicone caulk for corners and transitions.
Subfloor & Wall Readiness
For concrete subfloors, repair any cracks larger than 1/8″ with an appropriate crack filler. Remove any paint, sealers, or curing compounds that could prevent proper adhesion. For uneven concrete, self-leveling compound can correct dips up to 1½ inches.
With wood subfloors, ensure it’s at least 1-1/8″ thick total and supported by floor joists no more than 16″ apart. Secure any loose areas with screws rather than nails. Then install cement backer board (minimum 1/4″ thick) with proper screws, tape and mortar all seams, and leave a 1/4″ gap at walls for expansion.
For walls, remove baseboards, trim, and fixtures before installing cement backer board directly to studs. In wet areas, waterproof all seams and corners—this step is non-negotiable for shower and tub surrounds.
Before you start tiling, remove the toilet, vanity, and any floor-mounted fixtures. It’s much easier to tile around the toilet flange than to cut tiles around the toilet itself!
Safety First
Tile dust contains silica, which can cause serious respiratory issues over time. Always wear a quality dust mask when cutting tile or mixing powdered materials.
Protect your eyes with safety glasses, wear knee pads to protect your joints, and use gloves when handling mortar and grout. These materials can be harsh on skin, and fresh-cut tile edges can be surprisingly sharp.
Ensure adequate ventilation, especially when using chemical cleaners or sealers. Keep all electrical tools away from water and use GFCI outlets for additional protection against electrical shock.
If you’re removing old vinyl flooring installed before the mid-1980s, be aware it may contain asbestos. Consider professional testing or removal rather than risking your health.
Bathroom Tile Installation: Step-by-Step Game Plan
Now that you’ve prepared properly, it’s time for the actual bathroom tile installation. Following these steps in order will ensure professional results.

Mixing Mortar & Setting the First Rows
Start by preparing your thinset to a peanut-butter consistency according to the manufacturer’s instructions. Only mix what you can use within 30 minutes to prevent waste and hardening in your bucket.
After mixing, let the mortar “slake” for about 5-7 minutes before giving it a quick remix. This resting period improves adhesion and workability.
Locate your chalk lines and secure a straight board (a level works perfectly) to create a true edge for your first row. This guide ensures you start with perfectly straight lines.
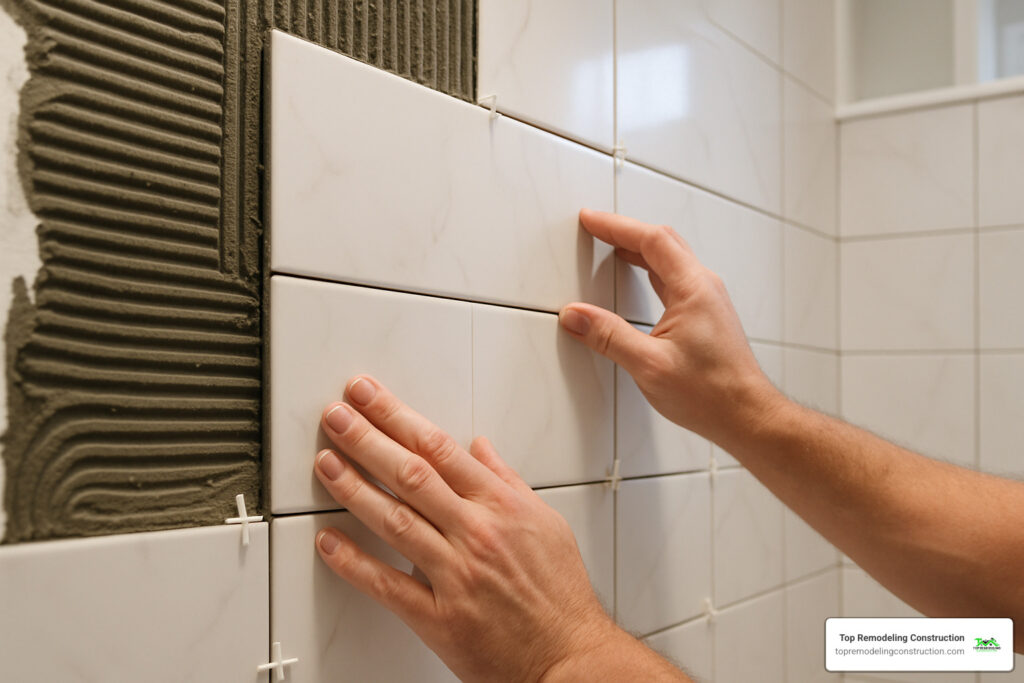
When applying mortar, first use the flat side of your trowel to create a good bond coat, pressing firmly into the substrate. Then, flip to the notched side, holding it at a 45° angle to create even ridges. Always comb in one direction so air can escape when you set your tiles. Work in manageable sections of about 2-3 square feet.
As you set your first tiles along your guide board, include spacers immediately and press each tile with a slight twisting motion to ensure good contact. Check your level frequently and occasionally lift a tile to verify you’re getting 80-90% mortar coverage underneath.
Bathroom Tile Installation Field Tiles & Perimeter Cuts
Once your starter rows are established, continue working in 2-3 square foot sections, maintaining your pattern. Always maintain a 1/4″ expansion gap at all walls and fixed objects to prevent buckling and cracking.
For straight cuts, use a wet saw. L-shaped cuts require two passes on your wet saw. For curved cuts around pipes or fixtures, use nippers to carefully remove small pieces after scoring the line. For holes for shower valves or other round penetrations, a carbide-tipped hole saw attachment for your drill works well.
When working on perimeter tiles, measure each space individually and account for both the expansion gap and spacers. Where possible, position cut edges against walls where they’ll be hidden by baseboards or trim.
After all your tiles are placed, let the mortar cure for at least 24 hours before walking on the tiles or grouting.
Can You Tile Over Existing Tile?
Tiling over existing tile can save demolition time and mess, potentially reduce costs, and add stability to your floor. For older homes, this approach can even be safer by avoiding the disturbance of asbestos that might lurk in older flooring layers.
However, the additional layer will raise your floor height by at least 3/8″, which can create transition issues at doorways and require adjustments to toilets and vanities. The existing tile must be perfectly adhered and level, or your new installation will inherit all the previous flaws.
This method works best when the existing tile passes the “coin test” – tapping with a coin should produce a solid sound with no hollow spots. The surface should be level without significant lippage between tiles.
Preparing existing tile requires thorough cleaning with a degreasing cleaner followed by sanding or scrubbing to create microscopic scratches for better mortar grip. Apply a bonding primer specifically designed for tile-over-tile applications, and use modified thinset mortar formulated for this purpose.
Finishing Touches: Grouting, Sealing & Long-Term Care
The final steps of bathroom tile installation are crucial for both appearance and longevity.

Grouting Process:
Choosing the right grout is your first important decision. For wider joints (1/8″ or more), sanded grout gives you the strength you need, while unsanded grout works perfectly for narrower joints or with delicate tiles that might scratch easily. Epoxy grout offers exceptional stain and water resistance—a worthy consideration for busy bathrooms.
Before mixing any grout, remove all spacers and clean excess mortar from the joints. Only mix what you can use in 20-30 minutes.
When applying grout, hold your rubber float at a 45-degree angle and work diagonally across the joints to ensure they’re completely filled. After filling a section (about 10-15 square feet), tilt your float to a steeper angle to remove excess grout from the surface.
Wait about 15-20 minutes until the grout begins to haze over, then use a damp—not wet—sponge in gentle circular motions. Rinse your sponge frequently and wring it thoroughly each time. After 2-3 hours, you can remove any remaining haze with a microfiber cloth.
Use matching silicone caulk instead of grout for all inside corners and where tile meets fixtures like your tub, shower pan, or vanity.

Wait at least 72 hours after grouting before applying sealer. Most sealers require 2-3 coats with drying time between applications. Be sure to wipe away excess sealer before it dries on your tile surfaces.
The final touches include installing transition strips at doorways, reinstalling baseboards or quarter round molding, and carefully reinstalling your toilet and fixtures. A bead of silicone around the bases of fixtures provides that professional, water-tight finish.
Maintenance & Cleaning
For daily and weekly cleaning, stick with pH-neutral cleaners specifically formulated for tile and grout. If you’ve installed natural stone, avoid acidic cleaners like vinegar or citrus-based products that can etch the surface. Wiping down shower walls after use prevents soap scum buildup, while using a squeegee on glass tile prevents water spots.
Monthly maintenance includes checking your grout for staining or mildew, and cleaning grout lines with a soft brush and appropriate cleaner. Inspect caulk lines for any signs of mold or separation.
Reapply grout sealer every 1-2 years (more often in heavy-use showers), replace any damaged caulk, and check for loose or hollow-sounding tiles that might need attention.
Avoid bleach, which can discolor grout, and steer clear of abrasive cleaners or pads that can scratch your tile. Keep oil-based products away from porous tile to prevent staining, and never use acidic cleaners on marble or limestone.
With proper care, your bathroom tile will remain beautiful and functional for decades. If you ever need professional assistance with maintenance or are considering another renovation project, our team at Top Remodeling Construction is always here to help create spaces that combine beauty with durability.
Frequently Asked Questions about Bathroom Tile Installation
How much does bathroom tile installation cost in 2025?
In 2025, you can expect to pay between $10 and $50 per square foot for a complete bathroom tile installation, including both materials and labor. For a typical bathroom (40-160 square feet), this means $400 to $8,000 depending on your choices and space size.
Your materials will run between $2 and $30 per square foot, with basic ceramic at the lower end and luxury natural stone commanding premium prices. Professional labor typically adds another $8 to $20 per square foot. Demolition work adds $2 to $7 per square foot.
Here in Las Vegas, most homeowners land somewhere in the middle of these ranges. Tackling this as a DIY project could save you $500 to $1,500 on a standard bathroom.
How long will the project take from start to finish?
A realistic timeline for bathroom tile installation includes:
- 1-2 days for planning and shopping
- 1 day for demolition
- 1 day for surface preparation
- 1 day for installing backer board
- 1-2 days for tile setting
- 24 hours minimum curing time before grouting
- 1 day for grouting
- 72-hour curing period before the bathroom can handle moisture
Expect your bathroom to be “under construction” for 7-10 days from start to finish, though only 3-4 of those days involve active work. The rest is simply waiting for materials to properly cure.
When should I hire a professional instead of DIY?
Consider professional help for your bathroom tile installation when:
- You’re dealing with significant substrate issues like floor damage, structural problems, or extensive water damage
- Working with expensive materials like marble, glass, or handmade artisan tiles
- Implementing complex patterns like herringbone or basketweave
- Tackling challenging features such as steam showers, curved walls, or zero-entry showers
- You’re under time constraints and need the job completed quickly
- Critical waterproofing is needed, especially in shower enclosures
- Your home was built before the mid-1980s with original vinyl flooring that might contain asbestos
At Top Remodeling Construction, we’re happy to provide free consultations to help you decide whether DIY makes sense for your specific project. Many homeowners find success with a hybrid approach—having professionals handle the technical preparation and waterproofing while they tackle the more straightforward tile setting themselves. More info about our full-service remodeling is always available if you’d like to explore your options.
Conclusion
A successful bathroom tile installation transforms your space while providing lasting protection against moisture. By following this comprehensive guide, you’ve learned how to properly plan, prepare, install, and maintain your new bathroom tile.
Proper preparation forms the foundation of every successful tile project. A stable, clean, and level substrate prevents future headaches like cracking or lippage. Similarly, investing in quality materials—from appropriate backer board to premium setting materials—pays dividends in durability and appearance over time.
Your technique during installation directly impacts how long your tile will last. Proper mortar application with consistent ridge direction, even spacing, and thorough grouting create that professional finish that friends will assume you hired experts to achieve. And don’t rush! Those curing times between steps aren’t just suggestions—they’re essential for preventing failures that could compromise your hard work.
Once your beautiful new tile is in place, regular maintenance will keep it looking fresh for years. A simple routine of appropriate cleaners and periodic sealing preserves both appearance and functionality, protecting your investment for the long haul.
Whether you’ve decided to tackle this project yourself or bring in professionals, you now have the knowledge to ensure quality results. At Top Remodeling Construction, we’ve helped countless Las Vegas homeowners achieve beautiful, durable bathroom tile installations that stand the test of time.
Our family-owned business prides itself on exceptional attention to detail and customer satisfaction. If you’d like assistance with your bathroom renovation, from design consultation to complete installation, we’re here to help create the bathroom of your dreams.